How to deploy ClickHouse Server with Docker Compose
Containers / SQL 14-05-2023, 22:16 sobir 13 781 0
ClickHouse is an open-source column-oriented database management system that allows generating analytical data reports in real-time. (developed by Yandex)
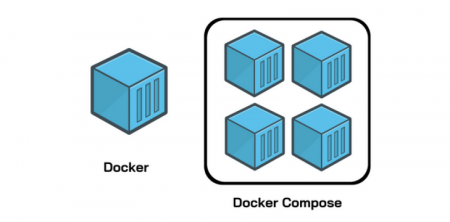
In this tutorial, I will show you how to install a ClickHouse database server on your machine with Docker Compose. Assuming you have already installed the Docker containerization engine with Compose.
1. Create a directory for our project:
mkdir /opt/clickhouse2. Change directory and create a docker-compose.yml file:
cd /opt/clickhousevi docker-compose.yml
version: '3.7'

networks:
  default:
    name: ch-net
    external: true

services:

  clickhouse-server:
    image: yandex/clickhouse-server
    container_name: clickhouse-server
    ports:
      - '8123:8123'
      - '9000:9000'
    volumes:
      - ./db:/var/lib/clickhouse
    ulimits:
      nofile: 262144
3. Create a persistent network for the ClickHouse server container:
docker create network ch-net4. Pull the image and run it:
docker compose up -d5. Check the status:
docker ps6. Connect to the ClickHouse server via the native client:
docker compose exec clickhouse-server clickhouse-clientNext, we need to:
1) Turn on SQL based access control;
2) Create a superuser account;
3) Restrict the default user.
For this, first, we need to get the configuration file users.xml from the running container and save it on the host permanently.
7. Get the configuration file users.xml from the running container:
docker inspect clickhouse-server | grep -i merged
cp /var/lib/docker/overlay2/put_your_path/merged/etc/clickhouse-server/users.xml /opt/clickhouse/8. Edit users.xml by uncommenting the option access_management:
vi /opt/clickhouse/users.xml
<clickhouse>
    ...
    <users>
        ...
        <default>
            ...
            <access_management>1</access_management>
        </default>
    </users>
    ...
</clickhouse>
9. Include the config in docker-compose.yml:
vi docker-compose.yml
version: '3.7'

networks:
  default:
    name: ch-net
    external: true

services:

  clickhouse-server:
    image: yandex/clickhouse-server
    container_name: clickhouse-server
    ports:
      - '8123:8123'
      - '9000:9000'
    volumes:
      - ./users.xml:/etc/clickhouse-server/users.xml
      - ./db:/var/lib/clickhouse
    ulimits:
      nofile: 262144
9. Restart the container:
docker compose down
docker compose up -d
10. Connect to the ClickHouse server via the native client:
docker compose exec clickhouse-server clickhouse-client11. Create a local account for the superuser:
:) CREATE USER root HOST LOCAL IDENTIFIED WITH sha256_password BY 'password';12. Grant all privileges to the superuser:
:) GRANT ALL ON *.* TO root WITH GRANT OPTION;13. Quit the cli:
:) quit10. Restrict read-only access for the default user:
vi /opt/clickhouse/users.xml
<clickhouse>
    ...
    <users>
        ...
        <default>
            ...
            <profile>readonly</profile>
            ...
            <access_management>0</access_management>
        </default>
    </users>
    ...
</clickhouse>
11. Restart the container:
docker compose down
docker compose up -dQuick setup Zimbra Mail server with Docker and Compose....
ПодробнееКонтейнеризируем сервисы LEMP с помощью docker-compose....
ПодробнееQuick setup docker and docker-compose with a simple bash script....
ПодробнееСоздание выделенной сети контейнерам Docker....
ПодробнееПоднимаем VPN сервер OpenConnect (ocserv) в контейнере Docker с аутентификацией пользователей из Microsoft...
ПодробнееQuick setup docker and docker compose with a simple bash script....
ПодробнееНовые комментарии
Цитата: FidoNet Цитата: sobir Цитата: FidoNet Спасибо за статью. Остальные
Цитата: sobir Цитата: FidoNet Спасибо за статью. Остальные статьи что находил
Цитата: FidoNet Цитата: sobir Цитата: FidoNet Можт быть дело в
Цитата: sobir Цитата: FidoNet Можт быть дело в dnsmasq.service? Ошибка Failed
Цитата: FidoNet Цитата: sobir Цитата: FidoNet Спасибо за статью. Остальные
Можт быть дело в dnsmasq.service? Ошибка Failed to set DNS configuration: Unit
Какой дистрибутив Linux вы часто используете?
Календарь
| « Январь 2026 » | ||||||
|---|---|---|---|---|---|---|
| Пн | Вт | Ср | Чт | Пт | Сб | Вс |
| 1 | 2 | 3 | 4 | |||
| 5 | 6 | 7 | 8 | 9 | 10 | 11 |
| 12 | 13 | 14 | 15 | 16 | 17 | 18 |
| 19 | 20 | 21 | 22 | 23 | 24 | 25 |
| 26 | 27 | 28 | 29 | 30 | 31 | |


